Reversing Unreal Materials (Street Fighter V)
This article aims to provide a way to easily extract and understand how a game like Street Fighter V renders its different materials (e.g., clothes, skin, eyes). I will assume that you have a rough understanding of how a shader is behaving, nothing more. If you don't, you can read my article on the creation of a 3D engine from scratch.
Primer: Materials
This whole section explains what materials are in a 3D engine. If you're already at ease with it, skip to the next section.
The concept of a material is pretty self-explanatory in the context of rendering. It is a description on how an object's matter should behave with light. At every point on its surface, we will want to know a set of properties like:
- Is it transparent? How much?
- Is it emitting light? Which kind? What colour?
- Is it reflective? If so, what's its orientation?
- How rough is its surface?
- What is its main colour?
And somehow, you have to bind what the 3D artist has prepared for you in terms of textures and such to your program and your shaders. Obviously, it will not be as easy as “I define a set of textures that you have to give me, and it will apply to all objects”. A wall will not have the same way of processing than an eye or a translucent window.
Shading Model
The shading model is a way to make your rendering pipeline more abstract. Instead of applying detailed shaders with similar computation between the different objects, you provide a different set of categories.
For example, you can code your engine in a way where it can only render “translucent materials”, “opaque surfaces” and “skins”. For each category, you specify exactly what inputs you need in order to render those like: the albedo colour, the PBR parameter vector (e.g., roughness, metallic, …), normal vector and so on.
Each category constitutes a “model” of how the rest of your graphical pipeline will behave. Once this is explicit, it is pretty easy to shape your engine towards this aspect. Note that having a deferred rendering makes this even more explicit, as a lot of those inputs will likely be embedded inside your intermediate buffers.
In the case of Unreal, you can see the list of Shading Models supported with the desired list of inputs.
Naturally, your shading model may support additional configurable features like tessellation with displacement or having different blending properties for handling transparent materials or configuring advanced flags. As you can see, I'm skipping a lot of attributes and details. The main point I want to focus on here: you have to provide a set of inputs for each pixel.
Material Definition
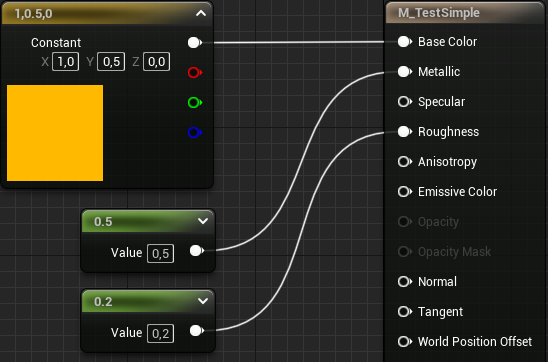
To simplify, we can say that a material is defined by: a shading model AND a way to compute all those input attributes (using artists assets or else). Obviously, this is easier said than done. It could be something trivial like “albedo colour is yellow”, or it could be “albedo is coming from this texture mixed with a masking texture controlled by a gameplay parameter and on top of that near the border of the mesh, I want a black outline which pulses with time”.
At that point, you should clearly see that this can become hard quickly. There are a couple of ways to deal with it, but mainly: either you define your material mainly as shader code (like for instance Google Filament or Unity) or you use a dedicated configuration tool, usually a graph editor, which describes the operations to perform (like for instance Unreal or Unity with Shader Graph). Internally, both methods consist of the same idea: you generate actual shader code and pipeline which will be embedded inside your shading model which is executed by your GPU.
Parametrization and Functions
The additional benefit of such definition is that you can reuse a lot of subparts. For instance, let's say you want to make two cloth items. They share the same structure of material, but they have different texture assets. You could copy and paste your material configuration and change the textures, or you could just define, for instance, the albedo texture as a parameter. There are different types of parameters that you can think of. First, you can split them in two major categories: Dynamic (resolved at runtime) and Static (resolved at shader compile time). Both are able to use different data types: scalar, vector, or more complex objects like a texture. Let's look at a simple example.
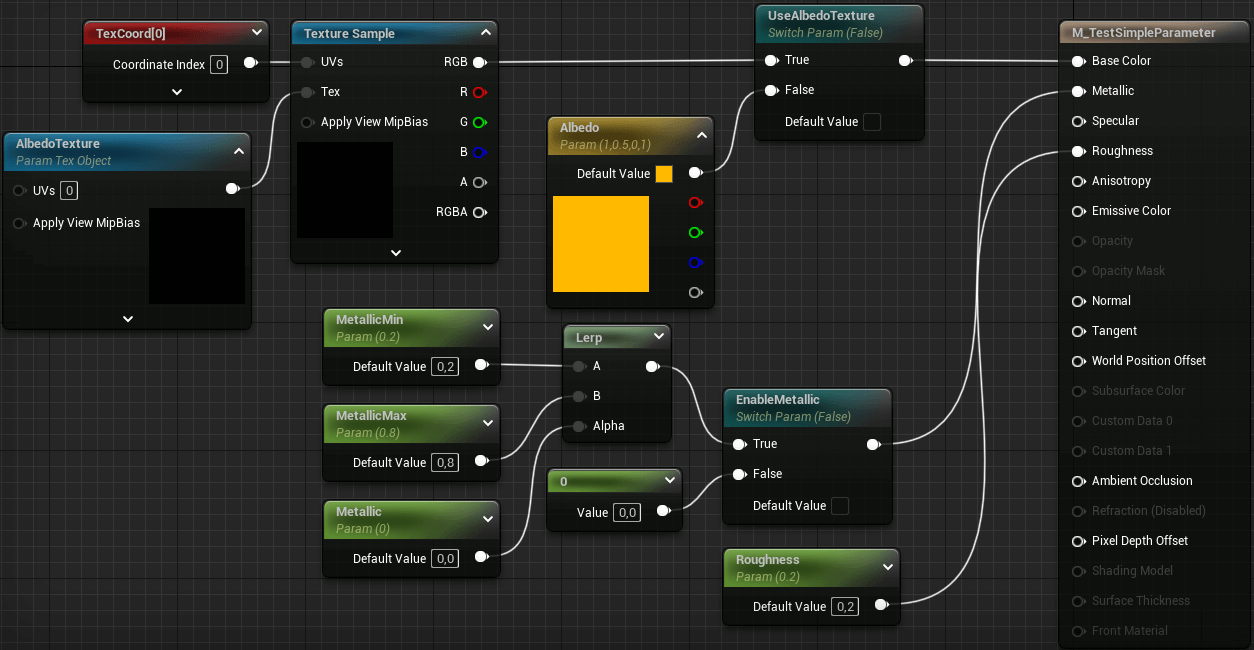
This material is an empowered version of the previous one. Firstly, we have the static toggle UseAlbedoTexture. If disabled, it will use the Albedo dynamic parameter without additional cost. If enabled, it will use the sampling of a parameter texture AlbedoTexture that will be given by whoever is using the material. Similarly, I've created a fancy way to select if I want the material to be metallic or not. And if it is metallic, then I want to control its effect between within a parametrized range.
In practice, you could use this material for very simple clothes. With this, you can just create new materials which inherits from the main one (in Unreal this is called Material Instance) with specific parameters for:
- Leather: weak metallic, albedo texture for shapes and creaks, medium roughness
- Belt buckle: strong metallic, no texture, weak roughness
- Cotton: no metallic, albedo texture for patterns, strong roughness
Obviously, those are very simple and in practice your materials will be more complex. You can use this parametrization to your advantage and avoid defining similar materials multiple times.
An additional aspect of materials is that subparts can just be used in different places. For instance, you want to describe a specific way of computing a contour (with a fresnel and other stuff), you can pack this in a function which can just be reused everywhere like in a normal shader program.
Hopefully, you should see how useful this concept is, and you should be able to understand why all 3D engine implement some ways of specifying a material.
Exporting materials from games
In the previous article I did on creating a 3D engine, I imported assets from Street Fighter V. But the assets were only meshes, textures, skeleton, and animations. But nothing has been imported for materials and shading model. We've just made a custom PBR shader (largely inspired from the Unreal Model) with some composition that was done by hand. In this article, the goal is to get the actual material data.
FModel and extracting material instances
I was a bit evasive on the tools that I used to export data from Street Fighter V. Here, the main tool that I'm going to leverage is FModel. This tool is able to browse all the baked content pretty easily. The main usage is usually to browse meshes, textures, animations, and sounds. But here, we are going to use their tool which converts a generic uasset file to JSON.
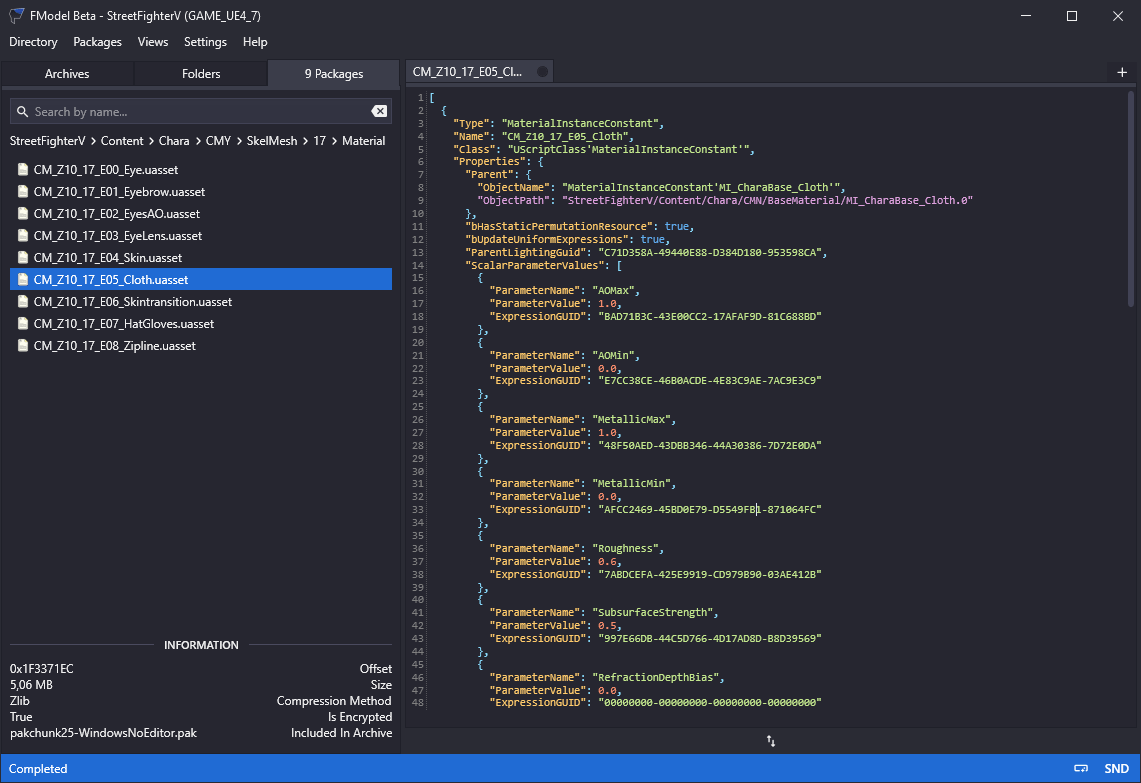
As you can maybe see here, the main shape is as followed:
[
  {
    "Type": "MaterialInstanceConstant",
    "Name": "CM_Z10_17_E05_Cloth",
    "Class": "UScriptClass'MaterialInstanceConstant'",
    "Properties": {
      "Parent": {
        "ObjectName": "MaterialInstanceConstant'MI_CharaBase_Cloth'",
        "ObjectPath": "StreetFighterV/Content/Chara/CMN/BaseMaterial/MI_CharaBase_Cloth.0"
      },
      "ScalarParameterValues": [
        {
          "ParameterName": "AOMax",
          "ParameterValue": 1.0,
          "ExpressionGUID": "BAD71B3C-43E00CC2-17AFAF9D-81C688BD"
        },
        ...
You can see intuitively the shape of a block. You have an identifier, a type (in this case Material Instance Constant), and a bunch of properties. The first one being Parent, where it says that it will first inherit the data coming from another material instance MI_CharaBase_Cloth in the common materials. Then, it says that it overrides some scalar parameters, here AOMax at value 1.0. This part is pretty intuitive. However, the material instance itself has some overrides, and finally goes up and up until it reaches the actual material definition. The final definition has all its parameter set. In the case of this instance we get all these parameters and switches set (FModel has a material viewer to see those, note that the Shading is wrongly set here as it should be Default Lit).
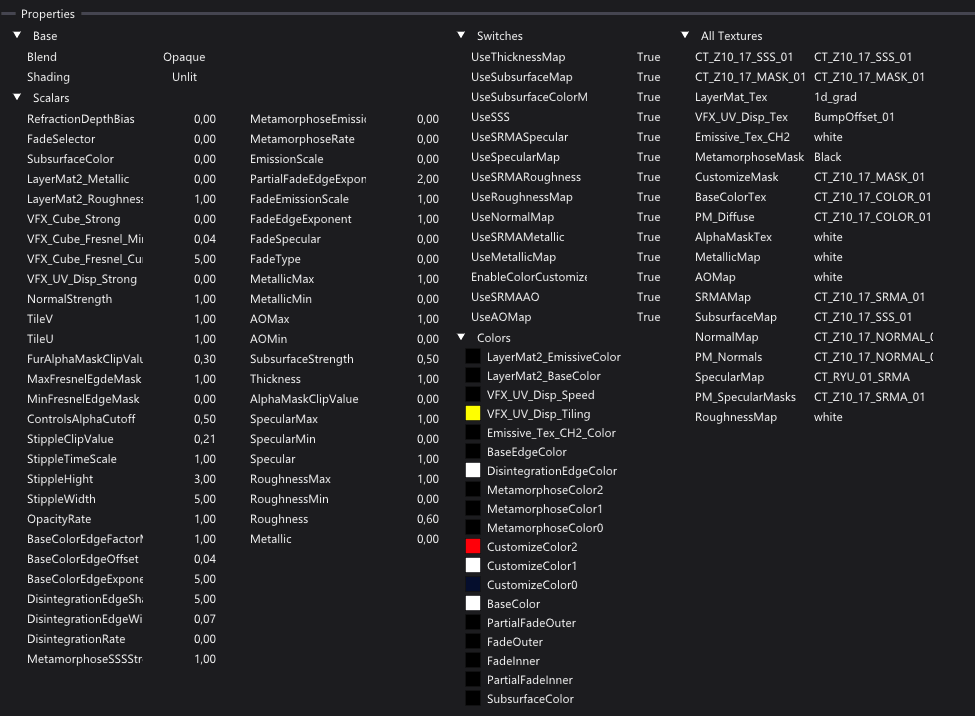
Note that the dynamic parameters might still be changed at runtime. For instance, we know for a fact that the CustomizeColor attributes are coming from the colours of the skins which are configurable, and in Street Fighter V there are usually 10 selectable colours. To simplify the extraction, we're going to use the JSON of the material viewer, which assembles all the hierarchy with all the parameters.
In this game, most materials for character models are sent to an über-big-massive material called M_CharaBase which is a 10500 lines JSON file. Let's dive into its structure.
Structure of material nodes
A material JSON is actually pretty simple. It is a list of nodes which corresponds to a node in the graph editor. Each node looks like this.
{
  "Type": "MaterialExpressionMultiply",
  "Name": "MaterialExpressionMultiply_2",
  "Outer": "M_CharaBase",
  "Class": "UScriptClass'MaterialExpressionMultiply'",
  "Properties": {
    "A": {
      "Expression": {
        "ObjectName": "MaterialExpressionScalarParameter'M_CharaBase:MaterialExpressionScalarParameter_6'",
        "ObjectPath": "StreetFighterV/Content/Chara/CMN/BaseMaterial/M_CharaBase.152"
      },
      "OutputIndex": 0,
      "InputName": "None",
      "Mask": 0,
      "MaskR": 0,
      "MaskG": 0,
      "MaskB": 0,
      "MaskA": 0,
      "ExpressionName": "None"
    },
    "ConstB": 2.0,
    "Material": {
      "ObjectName": "Material'M_CharaBase'",
      "ObjectPath": "StreetFighterV/Content/Chara/CMN/BaseMaterial/M_CharaBase.0"
    }
  }
}
The interpretation is pretty simple. This is a multiply node as its type suggests, it takes two inputs A and B. The documentation suggests that in this specific case, each input uses either an “expression” or a constant. Here, A is an expression and B is a constant. The expression is the output of another node, it is indexed by its object name or by its path which contains the file name (which will be the current file) and the number of the element. Assuming that MaterialExpressionScalarParameter_6 is stored in a variable called param. Then this node is strictly equal to the expression param * 2.0.
You can notice a “Mask” attribute in the properties of “A”. If enabled, this will indicate that the input is the output of the other node using a component selection. In shader code, if you have “MaskR” and “MaskB” enabled, the input will look like input.rb which is also similar to input.xz.
And that's all there is to it, scale this up to all the different kind of nodes, and to a big material composition, and you will get the definition of the whole material. The question now becomes: how can we interpret this mass of data to be able to use it.
Converting to readable pseudocodes
We could translate our specific cases to a new graph with nodes and so on. While we might do that eventually, I might even translate it to my own material edition model, I figured it was more interesting to convert it to a readable pseudocode. This will strongly help in the process of reverse engineering.
This is an example pseudocode that I'm able to extract from the definition of a material function. This code creates a fade effect which combines colours based on the proximity of the mesh edge using a Fresnel operation. You can see an exaggerated application where it was applied with inner colour at bright pink with a 50% transparency, outer colour at bright green and a fresnel exponent at 2.0. The fun part is that this code was NOT formatted by my hand, it is the pure output of the program which reads the function as a big JSON file.
MF_PartialFade(
    BaseColor: Any,
    InnerColor: Vector4,
    OuterColor: Vector4,
    EdgeExponent: Scalar,
) {
    return lerp(
        lerp(
            {BaseColor},
            {InnerColor}.rgb,
            clamp({InnerColor}.a)
        ),
        lerp(
            {BaseColor},
            {OuterColor}.rgb,
            clamp({OuterColor}.a)
        ),
        clamp(fresnel({EdgeExponent}, 0.0, normalWS))
    )
}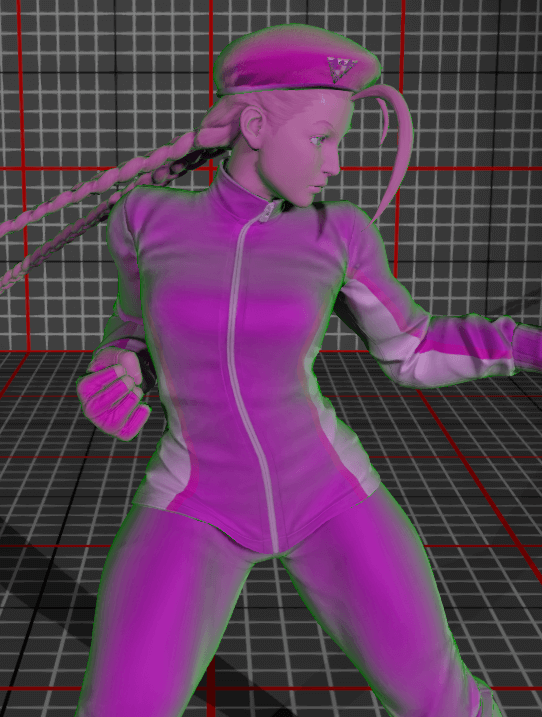
The code is structured as a classical compiler shape. It parses the JSON into an internal representation. Then, a serializer browses the internal state and yields a formatted code. This serializer is pretty smart as it is able to create local variables, inline intermediate results, create formatted blocks, simplify brackets and most importantly deal with switch parameters (where big branches of code are actually ignored).
I'm not going to spend too much time on explaining the code, as I want to focus more on the added value of such a tool. But I'm still going to show the overall structure, as it highlights some classic programming patterns.
The parser and the internal structure
The role of the parser is to transform the parsed JSON into an internal structure which prepares everything to be interpreted. As a reminder, the JSON is just a list of element, and each element will be parsed into a python object which is fully parsed. For instance, the multiply node we presented earlier will be an instance of BinaryOp("*", Expression(152), Constant(2.0)). This is self-explanatory, and the main point being that each class can know how to serialize for next.
The parser then just loops on all elements and generates the objects. The parsing is done based on the type attribute to select how we can translate the JSON structure into the class. While we are at it, we will also note all switch parameters, all available parameters and the usage count of each element. These attributes will be useful during the serialization.
The serializer
The serialization process is harder as I want to have a clean pseudocode at the end which includes inlining and parameter simplification.
The first part is being able to extract a variable. If we have an internal structure which is: BinaryOp("*", Expression(152), Expression(152)), with the 152nd node being a complex expression like normalize(...some stuff...). Then, instead of writing normalize(...) * normalize(...), the code will automatically write
expr_152 = normalize(...some stuff...)
// result
expr_152 * expr_152
But, if the 152nd node is only used once across the whole program, then, I will inline the serialization of the node when it is used. This becomes additionally hard when we want to activate switch parameters where complete branches may be cut, therefore we need to properly track the usage of each node on the branches that we are actually using.
There are a lot of subtleties about deciding if we need to open brackets or not, or if we need to introduce new lines and indents. I'm not going into that because it's not fascinating. The main point being that each object is able to emit tokens. The tokens are either strings or new lines, or opening / closing blocks (which deals with indents). Once we have the list of tokens, we can actually serialize to the actual output.
So, now, when we parse a material instance, we have the full description of the material, its switch parameters and its default parameter values. And based on this information, we can generate a pseudocode. Let's analyse one of those.
Analysis of one material
Preparation
I'm going to show in this section the cloth material of the tracksuit costume of Cammy in Street Fighter V. As a reminder, this is just a copy-paste of what the tool extracts. Let's look at the first part, which selects the base colour of our material.
base_color_tex = BaseColorTex.Sample(uv);
customize_mask = CustomizeMask.Sample(uv);
mf_calc_chara_base_color = MF_CalcCharaBaseColor(
    lerp(
        lerp(
            lerp(
                base_color_tex.rgb,
                {v:CustomizeColor0:float4(0.020125,0.056379,0.175,1.0)}.rgb * base_color_tex.rgb,
                customize_mask.rgb.r
            ),
            {v:CustomizeColor1:float4(1.51,1.772172,2.0,1.0)}.rgb * base_color_tex.rgb,
            customize_mask.rgb.g
        ),
        {v:CustomizeColor2:float4(1.0,0.0,0.03671,1.0)}.rgb * base_color_tex.rgb,
        customize_mask.rgb.b
    )
);
If you haven't seen my previous article on the colour customization, it's a way for artists to have a base costume and then change the colour of some parts. Thanks to a masking texture which allows selecting one or the other colour, the blending is done during runtime.
In our case, it starts with two texture sampling, which is simple enough. Then, we have three linear interpolation calls which blends based on the customization colour. If it wasn't explicit, the syntax {v:name:value} indicates a vector parameter with a default value. As you can see, you are allowed to have only 3 custom colours per material.
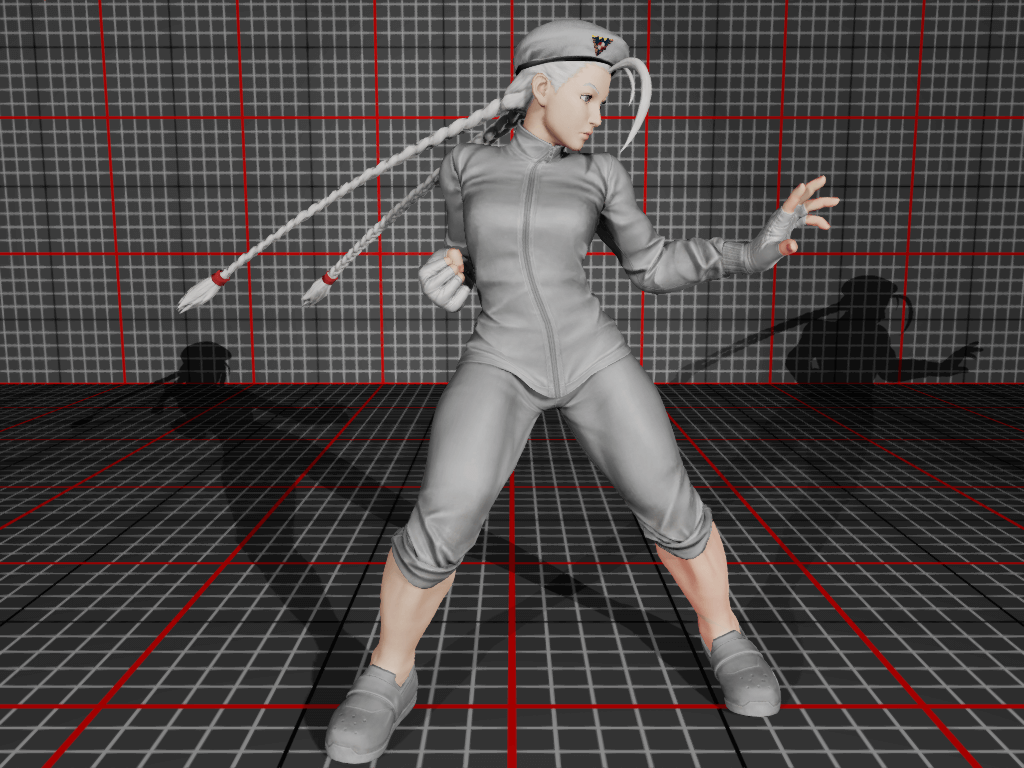
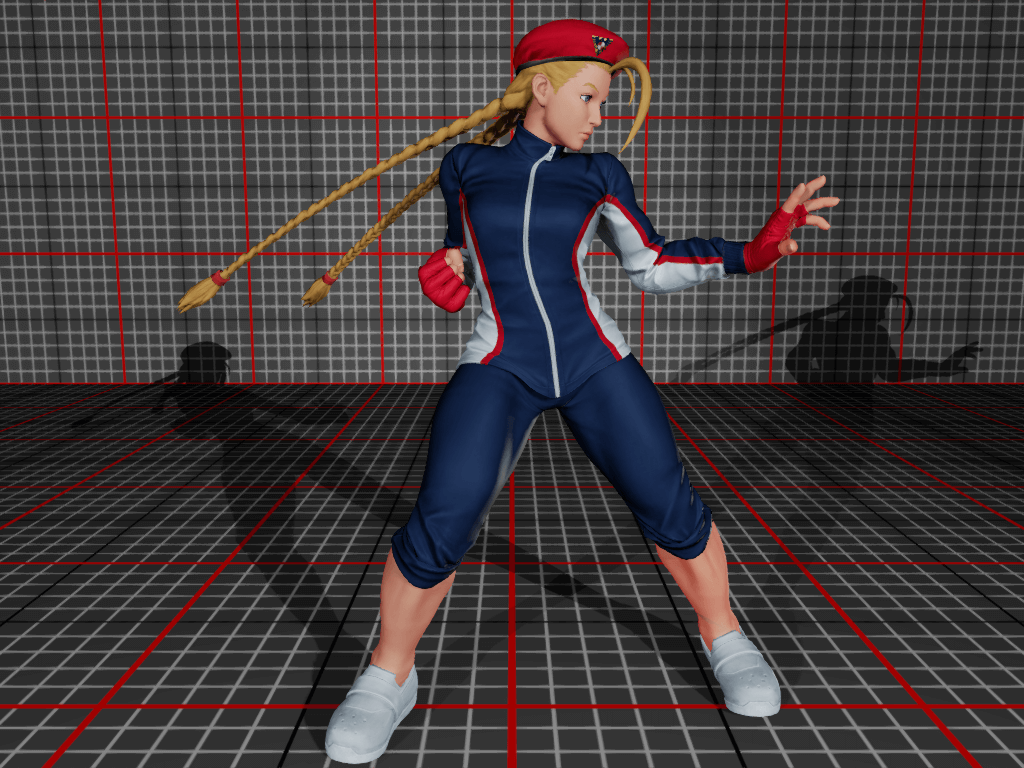
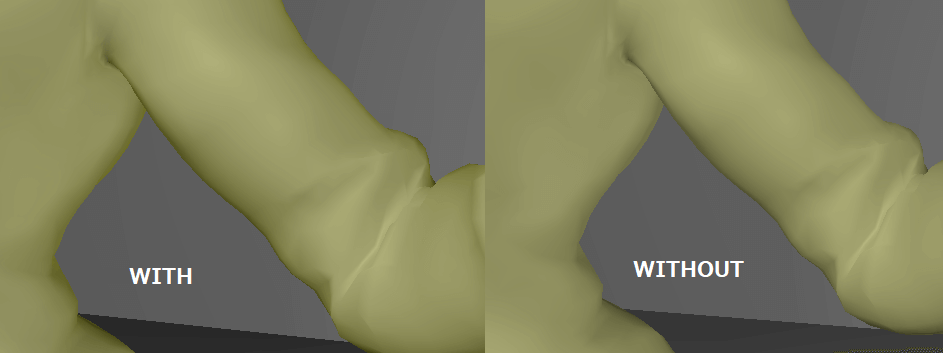
This base colour is sent to a custom function. This function only applies a fresnel effect which darkens the base colour near the border based on a fresnel factor. It is pretty subtle to be honest. But you will see below an example of the difference with or without this effect.
MF_CalcCharaBaseColor(
    BaseColor: Any,
) {
    return lerp(
        {BaseColor},
        {BaseColor} * {BaseColor},
        clamp(fresnel(2.0, 0.0, normalWS))
    )
}
Character effects
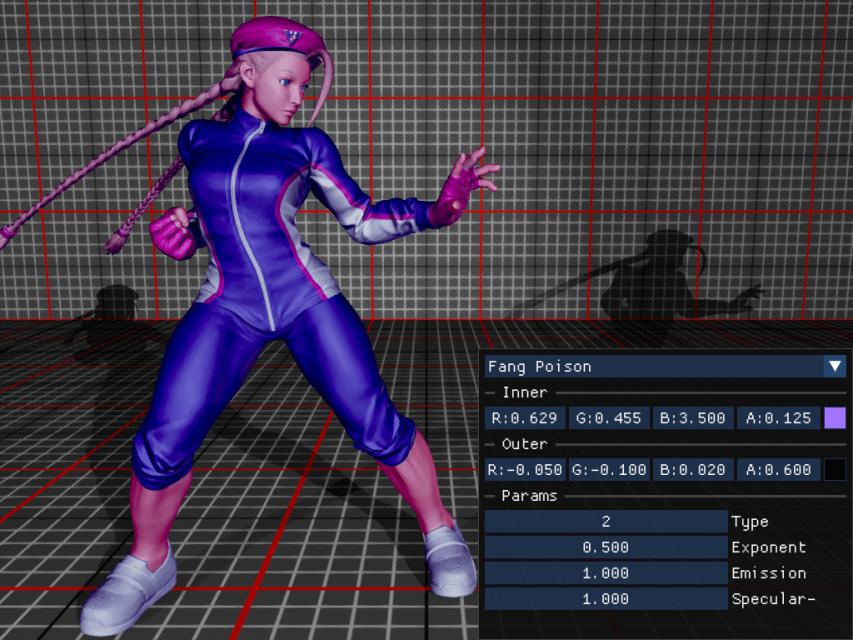
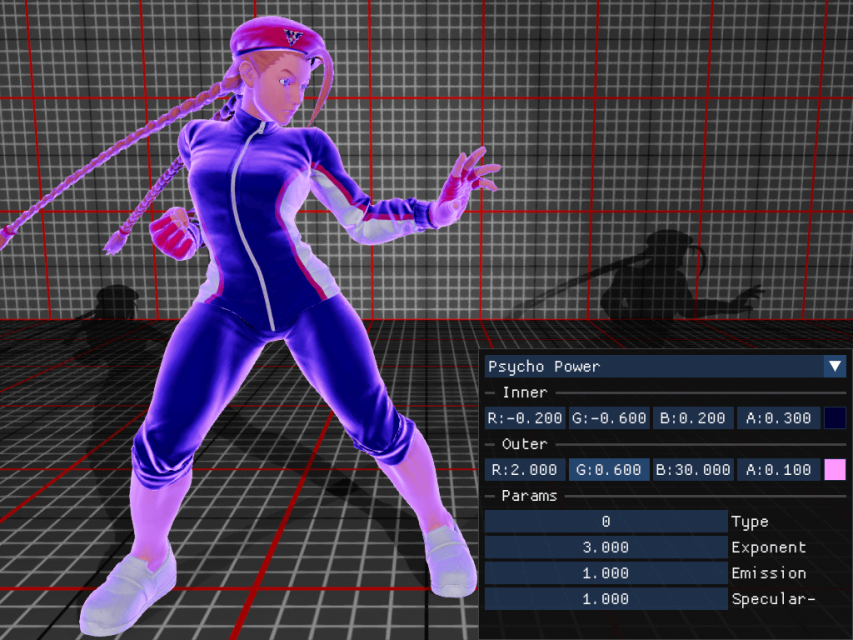
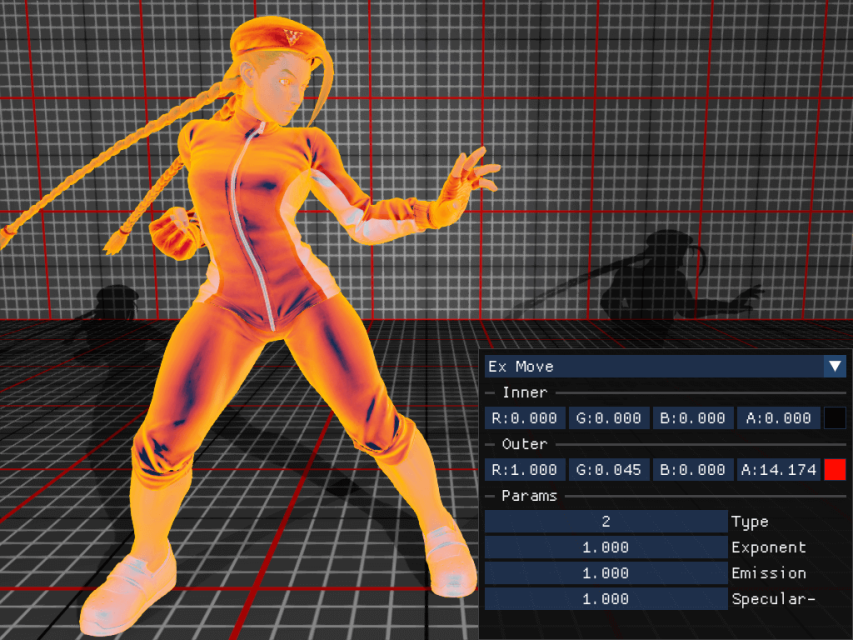
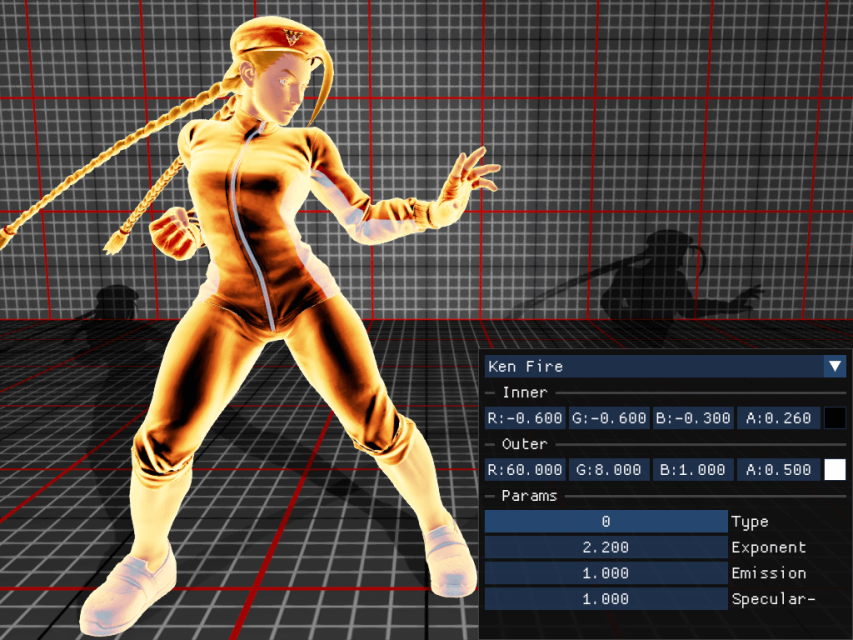
Then, we have the following code to deal with additional effects which can be used during runtime. Those effects are applied when the character is getting hit, or is activating a special power. This is using a similar effect than the MF_PartialFade that we presented earlier.
fade_inner = {v:FadeInner:float4(0.0,0.0,0.0,0.0)};
fade_outer = {v:FadeOuter:float4(0.0,0.0,0.0,0.0)};
mf_fade_select = MF_FadeSelect(
    {s:FadeSelector:0.0},
    floatN(fade_inner.rgb, fade_inner.a),
    {c:MPC_BattleParam.Player1_InnerFadeColor},
    {c:MPC_BattleParam.Player2_InnerFadeColor},
    floatN(fade_outer.rgb, fade_outer.a),
    {c:MPC_BattleParam.Player1_OuterFadeColor},
    {c:MPC_BattleParam.Player2_OuterFadeColor},
    {s:FadeType:0.0},
    {s:FadeEdgeExponent:1.0},
    {s:FadeEmissionScale:1.0},
    {s:FadeSpecular:0.0},
    {c:MPC_BattleParam.Player1_FadeParams},
    {c:MPC_BattleParam.Player2_FadeParams}
);
mf_color_fade = MF_ColorFade(
    mf_calc_chara_base_color.BaseColor,
    mf_fade_select.Inner,
    mf_fade_select.Outer,
    mf_fade_select.Type,
    mf_fade_select.EdgeExponent,
    mf_fade_select.EmissionScale
);
The MF_FadeSelect function will not be detailed because code is long but the main idea being that it will select the fading type and parameters based on the parameter FadeSelector.
- If
FadeSelector = 0: use the dynamic parameters (FadeInner,FadeOuter…) - If
FadeSelector = 1: use the parameters stored inMPC_BattleParam.Player1_* - If
FadeSelector = 2: use the parameters stored inMPC_BattleParam.Player2_*
Then, all the different attributes will apply the actual effect pass. This pass is adding a fresnel between the inner part and the outer part. However, the mixing of the additional colours and the base can be done differently:
- If
FadeType = 0: Use the mix inner / outer using the fresnel attribute and add it to be base colour. Outer colour is applied as emissive. - If
FadeType = 1: Same as the first one, but subtracts the mix from the base colour. (I haven't found an application yet). - If
FadeType = 2: applied the same mix asMF_PartialFadepresented earlier. Outer colour is applied as emissive with alpha multiplied.
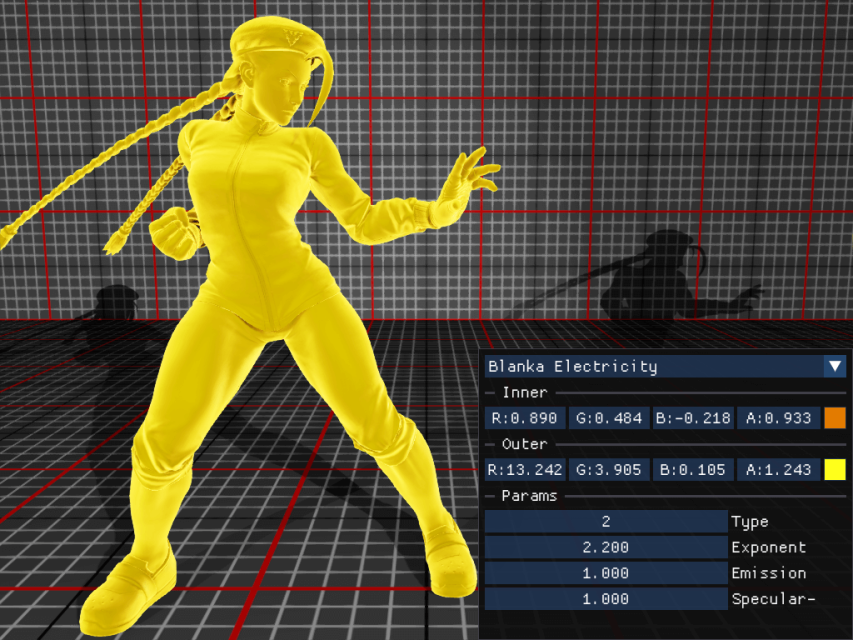
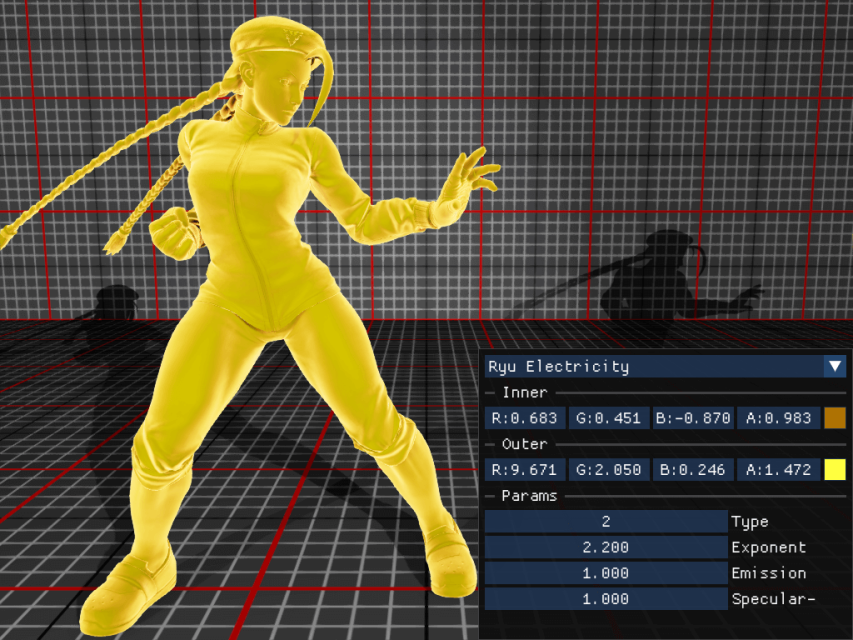
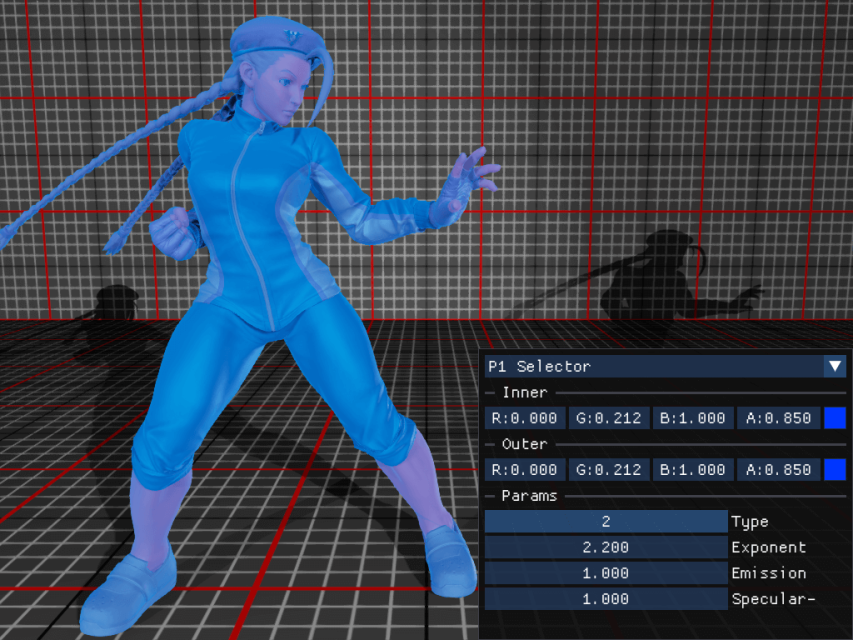
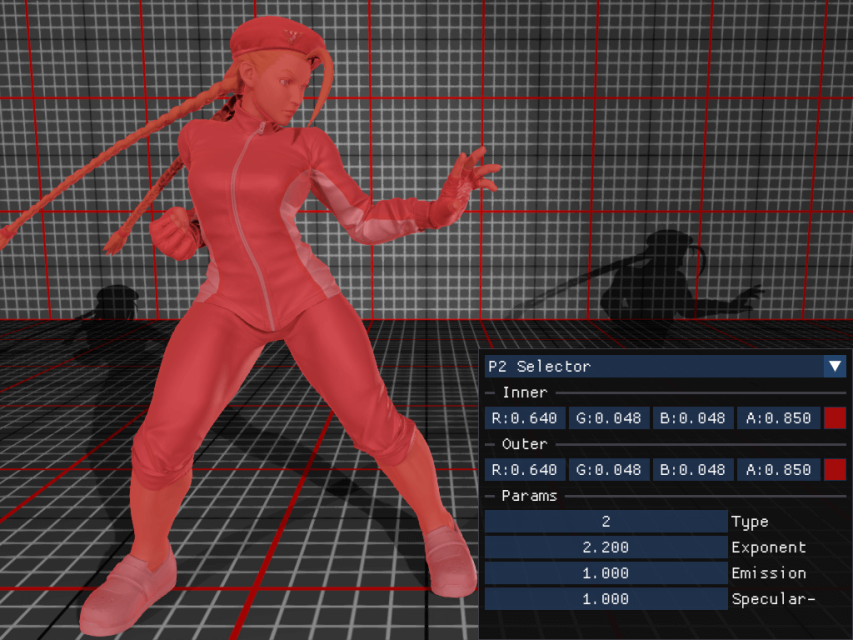
I have extracted the exact values from the actual game using PIX with a bit of reverse engineering magic (not really magic, the data is visible in one of the constant buffers sent to the gbuffer pass). I have noted a bunch of examples which I have applied to my own engine with the same implementation. Please note that I have a different lighting environment, so the result might be a bit different from the actual game, even though I made sure that the same tone mapping is applied to allow the same kind of contrasts.
Material Attributes
We have basically everything that we need to compose the actual material. First, we can assemble all the Material properties. As we can see, this one uses MaterialAttributes which is a way to combine a set of material properties, useful in Layered Materials.
Material {
    OpacityMaskClipValue = -0.0001
    TwoSided = False
    TranslucencyLightingMode = TLM_Surface
    bUsedWithSkeletalMesh = True
    bUsedWithMorphTargets = True
    bUsedWithClothing = True
    bUseMaterialAttributes = True
    bHasStaticPermutationResource = True
    bUpdateUniformExpressions = True
    BlendMode = BLEND_Opaque
    ShadingModel = MSM_DefaultLit
    MaterialAttributes = {
        MaterialAttributes {
            ...
        }
    }
}
Properties
In this section, I will describe the list of all the attributes using everything that I have prepared until now. All attributes shown here are actually part of the aforementioned material attribute.
Base and emissive colour
The first part is the simplest: what is the albedo colour of the material and what light does it emit? We can see that it uses the output of MF_ColorFade that we've seen earlier. This part has two output components, the result, and the emission. The emissive attribute also adds a flat scaling based on a parameter.
BaseColor = mf_color_fade.Result
EmissiveColor = {
    mf_color_fade.Emission + mf_calc_chara_base_color.BaseColor * customize_mask.a * {s:EmissionScale:0.0}
}
PBR properties and Ambient Occlusion
The main attribute properties for the lighting are Metallic, Specular and Roughness. We can also add Ambient occlusion in the mix, as this is pretty similar. I have not mentioned this earlier, but those properties are derived from the SRMA texture using a simple sample: srma_map = SRMAMap.Sample(uv);.
However, the game applies a function before being returned to the renderer. Fortunately for us, the interpretation is pretty simple: MF_CalcRoughness = MF_CalcSpecular = MF_CalcMetallic = MF_CalcAO = lerp. So basically, it just translates the attribute expressed in [0, 1] range into a given min/max range. For clothes, this is not bounded but for other materials like Skins, this is more restricted.
Metallic = {
    MF_CalcMetallic(
        {s:MetallicMin:0.0},
        {s:MetallicMax:1.0},
        srma_map.b
    ).Metallic
}
Specular = {
    MF_CalcSpecular(
        {s:SpecularMin:0.0},
        {s:SpecularMax:1.0},
        srma_map.r
    ).Specular - mf_fade_select.Specular
}
Roughness = {
    MF_CalcRoughness(
        {s:RoughnessMin:0.0},
        {s:RoughnessMax:1.0},
        srma_map.g
    ).Roughness
}
AmbientOcclusion = {
    MF_CalcAO({s:AOMin:0.0}, {s:AOMax:1.0}, srma_map.a).AO
}
We can additionally see that the specular attribute is removing the specular component from the fading pass. This is mainly done to disable specular reflections entirely when a special effect is being used.
Normal and position
Finally, we are lacking only two attributes, which are for the position offset in world space and the normal in tangent space. The latter one is easy, as it's available as a sampling of the normal map.
Normal = NormalMap.Sample(uv).rgb
WorldPositionOffset = MF_EzFixProj().Result
We can all notice a call to MF_EzFixProj. This seems to be a way to adjust bad screen ratios for some reason. It is unclear if it is used in practice because this is applied basically everywhere, but you should not need such thing normally.
MF_EzFixProj() {
    return (
        lerp(
            0.0,
            (
                (positionWS.r - cameraPositionWS.r) / (1920.0 * 0.5)
            ) * positionWS.g * {c:MPC_BattleParam.FixProjectionZScale},
            {c:MPC_BattleParam.FixProjectionXRate}
        )
    ) * float3(-1.0,0.0,0.0)
}
Finishing words
This was a fun escape from all the various improvements I am working on. I have been able to explain a bunch of my visual discrepancies that I had on my previous interpretation. Furthermore, it allowed me to better understand how the material system from Unreal is built. This is important as I am already building my own material system using similar concepts.
Being able to discover in details how they implemented some visual effects built inside the character shader is a neat surprise which I didn't expect to get. I had to dig a bunch inside the frame captures in order to extract the variables and validate my assumptions. I think I could be able to do a study similar to the famous GTA V study from Adrian Courrèges for Street Fighter V. That's an idea for an article.
Implementation
This whole project is still hosted in this gitlab project. And the specific implementation about the parser from FModel textures is available in the tools directory. Obviously, this is a dirty implementation, and it is not usable outside my environment without some change, but feel free to reach out if you are interested.
Miscellaneous
MF_ColorFade implementation
If you are interested in the actual implementation of how ColorFade is implemented, here is the dump of the code.
MF_ColorFade(
    BaseColor: Any,
    InnerColor: Vector4,
    OuterColor: Vector4,
    FadeType: Scalar,
    EdgeExponent: Scalar,
    FadeEmissionScale: Scalar = 1.0,
) {
    var_1 = clamp(fresnel({EdgeExponent}, 0.0, normalWS));
    var_21 = lerp(
        {InnerColor}.rgb * {InnerColor}.a,
        {OuterColor}.rgb * {OuterColor}.a,
        var_1
    );
    var_5 = clamp({FadeType});
    var_3 = clamp({FadeType} - 1.0);
    return {
        Result = {
            lerp(
                lerp({BaseColor} + var_21, {BaseColor} - var_21, var_5),
                lerp(
                    lerp(
                        {BaseColor},
                        {InnerColor}.rgb,
                        clamp({InnerColor}.a)
                    ),
                    lerp(
                        {BaseColor},
                        {OuterColor}.rgb,
                        clamp({OuterColor}.a)
                    ),
                    var_1
                ),
                var_3
            )
        }
        Emission = {
            lerp(
                lerp({OuterColor}.rgb, 0.0, var_5),
                {OuterColor}.rgb * {OuterColor}.a,
                var_3
            ) * var_1 * {FadeEmissionScale}
        }
    }
}

